
A video walkthrough of these techniques is available on YouTube: How AI Can Level Up Your Music Visuals (Without the Slop)
For as long as music visualizers have existed, most of them have worked in more or less the same way: they split the incoming audio into frequency bands and use those bands to drive different parts of the visualization. It's the logic behind everything from the old Winamp visualizer to Synesthesia and most of what came in between. In this post and video I want to talk about a different starting point that has only recently become practical, and that I think offers a much more accurate foundation to build visuals: separating a song into its instruments using AI stems separation, and letting each of those resulting tracks drive its own part of the picture.
I built two small demonstrations for this, using two tracks from my own library that I've enjoyed visualizing for past DJ sets: a drum & bass track (Totally Enormous Extinct Dinosaurs, remixed by Calibre) and a progressive psytrance one (Loud's "Peace Pipe," remixed by Dekel). The youtube video on the Vizloom channel is probably the best way to parse this process, but I will do my best to convey the same ideas in written form here. In this post I'll walk through:
- why frequency bands are so common;
- what AI "stem separation" changes;
- how I use stems to cleanly isolate percussions like a snare and a kick;
- some ideas to visualize melodies.
The Trouble With Frequency Bands
There's a good reason the frequency-band approach is everywhere. Its biggest strength is that it barely needs to know anything about the audio you feed it. You can split anything into frequencies, from an entire song down to an audio sample less than a second long. That makes it viable for real-time sources, where you only really know what's playing right now, with no reliable sense of what came before or what's coming next. For a huge range of use cases (performances with live instruments and improvisation, for example), splitting by frequency is pretty much the only way to take a crack at separating musical elements from one another.
And it isn't wrong, exactly. Most of a kick drum does live in the low band. The melody and vocals often sit in the mids, and a lot of percussion leans toward the mid-highs. The problem is that these elements are all commingled. In reality most sounds smear across almost the whole spectrum to some degree. Your melody is tangled up with snares and vocals. Your kick usually has a "click" that pokes into the high frequencies, and it shares most of the low band with the bass anyway.
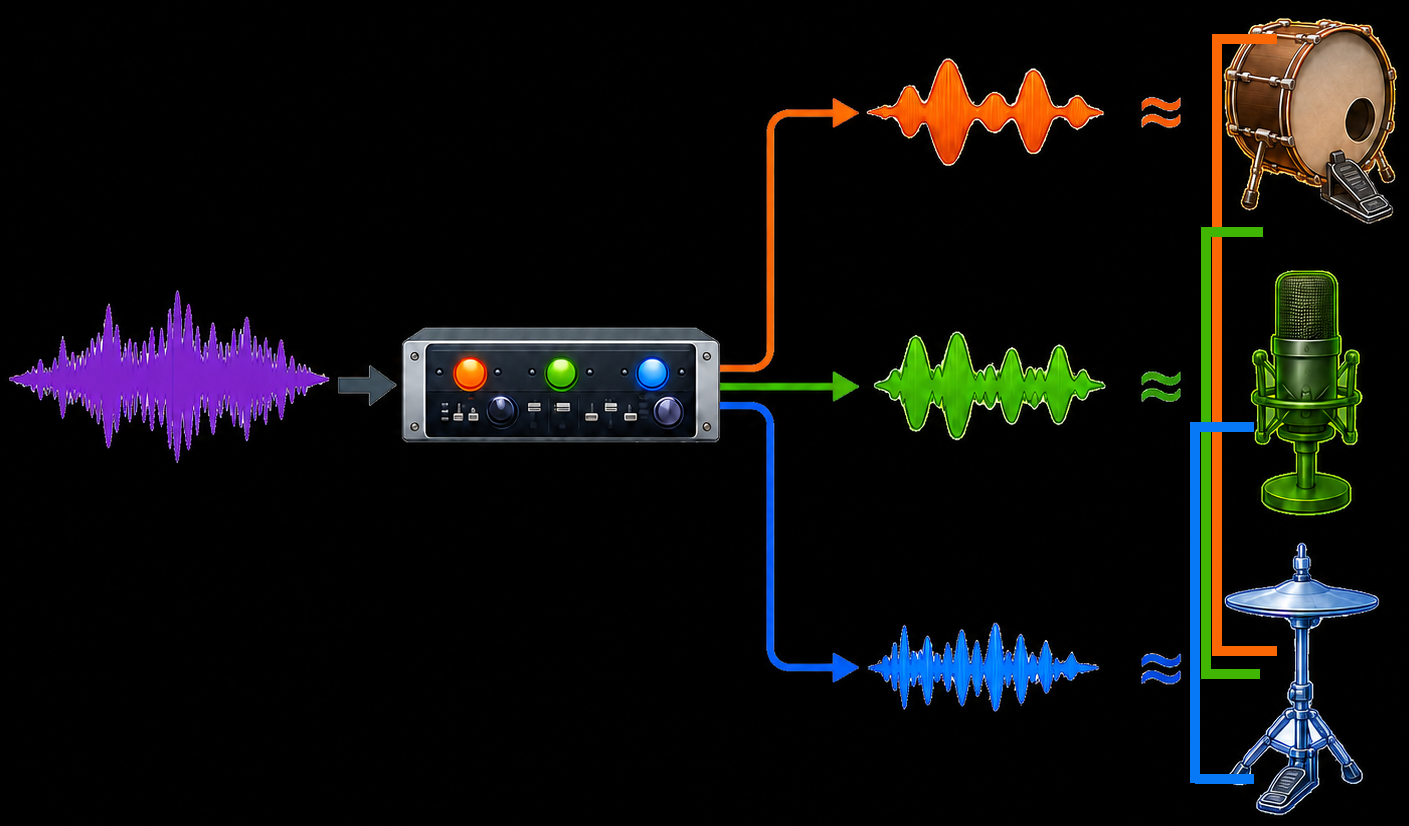
Frequency bands only ever approximate instruments: each band is a rough stand-in for the sound you actually wanted.
So the fundamental issue is this: frequency bands do not break a song into the same building blocks that our brains do. Our ears have a far more nuanced way of pulling a track apart into instruments and gestures than a handful of frequency ranges ever could, and I feel this difference is very hard to ignore when you throw it on a screen to drive music visuals.
Enter Stems
In recent years a new technology has closed a lot of that gap, and it has quietly become a staple of modern DJ software: stem separation. Given a finished track, it can split it into four layers that feel much closer to how we actually hear music: drums, bass, vocals, and "other," which in instrumental electronic music usually ends up being the melody and effects.
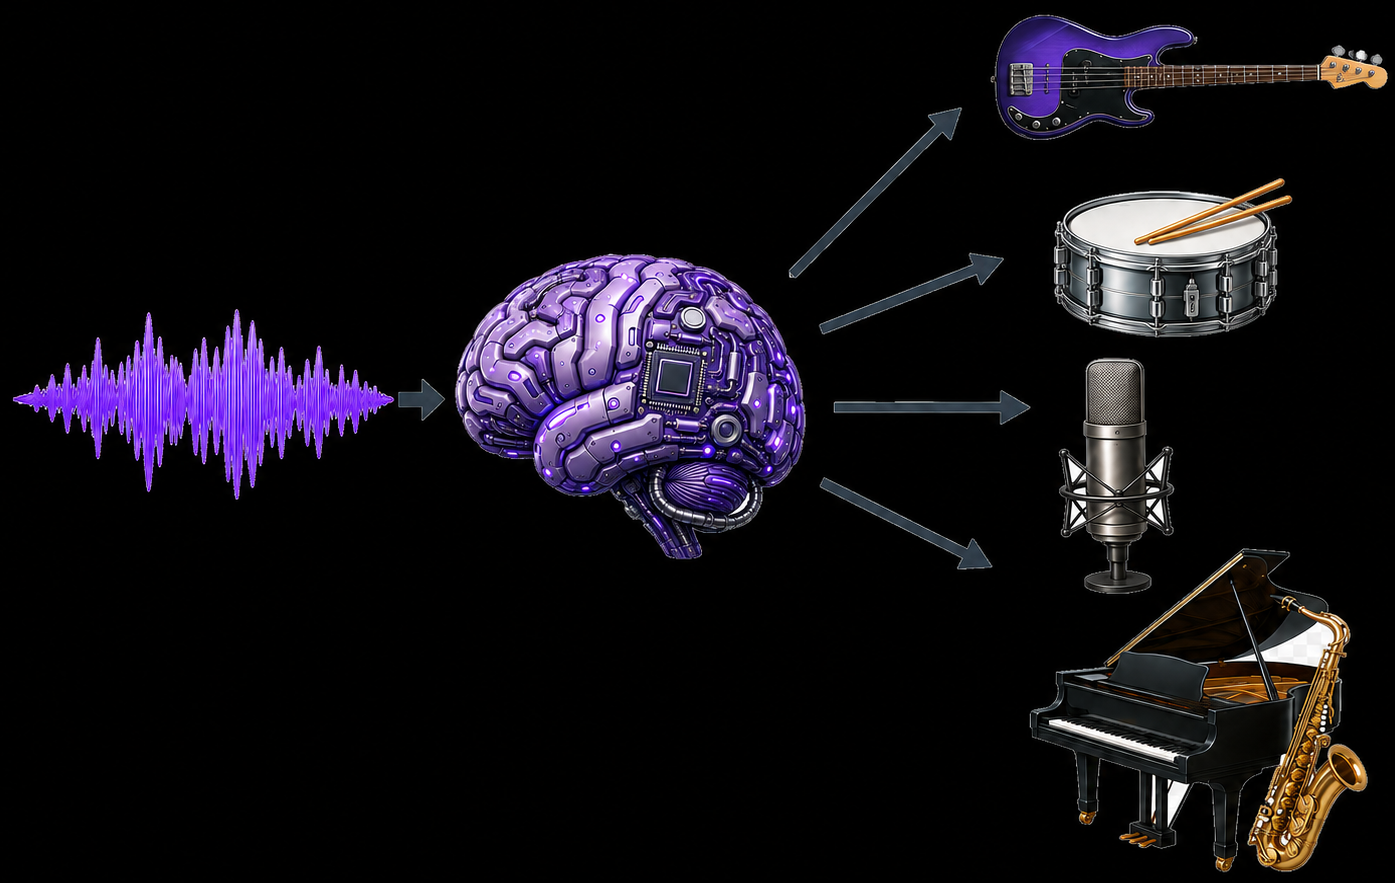
Stem separation splits a finished song into the instruments we actually hear in it.
There is a tradeoff. Stem separation needs longer stretches of audio to understand a song properly, which makes it less suited to real-time performance, at least for now (this stuff moves quickly). But that limitation doesn't really bite here, because Vizloom is built specifically around pre-recorded audio (like the songs sitting in your DJ library, your latest music album, or your backing tracks for live performances). That makes it a perfect playground for building visuals out of stems, which is what the rest of this is about.
I know a lot of the details below can feel like a lot of work for one to explore on their own, but don't despair: the point of Vizloom templates is to capture this knowledge and only surface the most important control knobs you might need for fine-tuning. Still, it might be useful to take a look under the hood, as it could inspire you to customize or develop these ideas further on top of what's provided.
Visualizing Drums
The snare: a metronome with some grounding
At its core, a "percussion" track in Vizloom is a metronome: you tell it a subdivision and an offset, and it marks out where a beat should land. For something as regular as a drum & bass snare, that's almost enough on its own.
The catch shows up in breakdowns and the variations between phrases. The metronome keeps happily firing at full-power while the actual snare sound has dropped out entirely. It has no bearing on whether the sound is actually there. To fix that, you can hand the track an audio hint: point it at an audio track that tries to capture the snare as cleanly as possible, and it will carve the animation to follow the song's real energy. (Feeding it the whole song helps too, but the snare would still bleed into moments where it shouldn't.) Behind the scenes (i.e. in the nodes editor) this kind of grounding can be achieved at its simplest by multiplying the two tracks by each other.
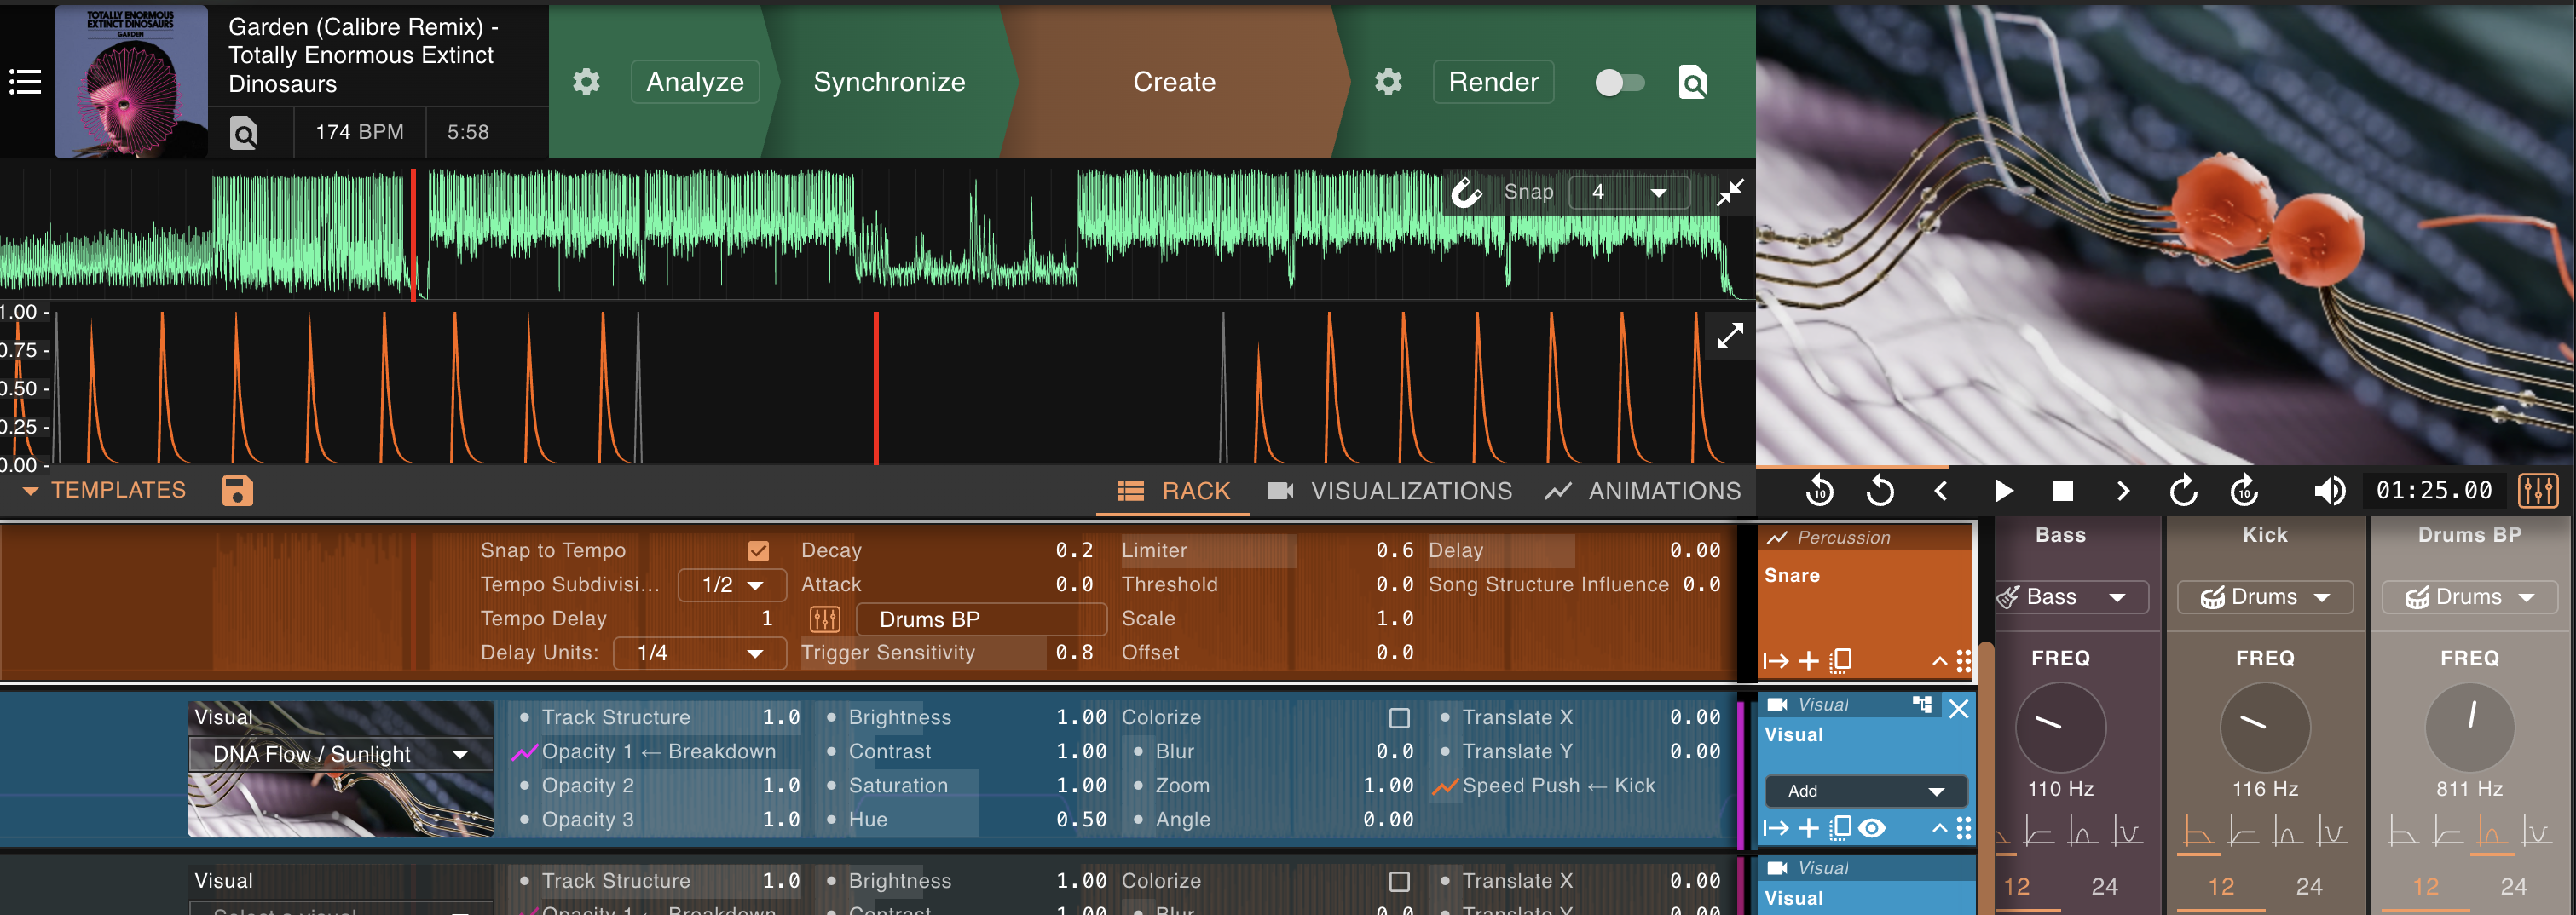
A snare percussion track grounded by an audio track: the pulses follow the metronome, but their strength follows the song.
How do we isolate the snare's sound as cleanly as possible then? The trick is to combine both techniques: extract a drums stem from the full mix, and pass it through a frequency-pass filter pointed at the mid-high frequency containing most of the snare's power. Suddenly it's almost perfect: the snare disappears from the breakdown and nearly vanishes from the intro. Note how Vizloom allowed us to easily combine three different techniques to achieve this: time filtering (the metronome), frequency filtering, and "category of sound" (the drums stem).
A tricky kick
In this specific example, the kick is more interesting precisely because a drum & bass kick isn't the tidy four-on-the-floor you get in a lot of electronic music. It's syncopated, so the metronome trick doesn't help. But it doesn't need to: we can extract a clean enough signal to drive the animation directly. Turn off "snap to tempo" and point the track at a "drums" stem with a low-pass filter applied to it. It will produce pulses that guess the kick's timing very precisely. Add a tad of decay for the animation to be ready to drive visuals.

With "snap to tempo" off, the kick track follows the syncopated rhythm of the song instead of a grid.
From there it becomes a matter of building the picture. In this specific example, I let the kick modulate playback speed and light up elements in the rhythmic sections.
Visualizing a Melody
Bass-a-move
As I was wrapping up the drum and bass example, I noticed something surprising: because of how different bass notes tend to result in different sound energy levels, the volume chart rises and falls to match each note, making the bass' riff appear obvious. I had some fun using this by have it drive a visual's color hue. I used an "Audio Track" animation to nudge scale and offset of the stem, so to keep the color changes tasteful rather than wild.
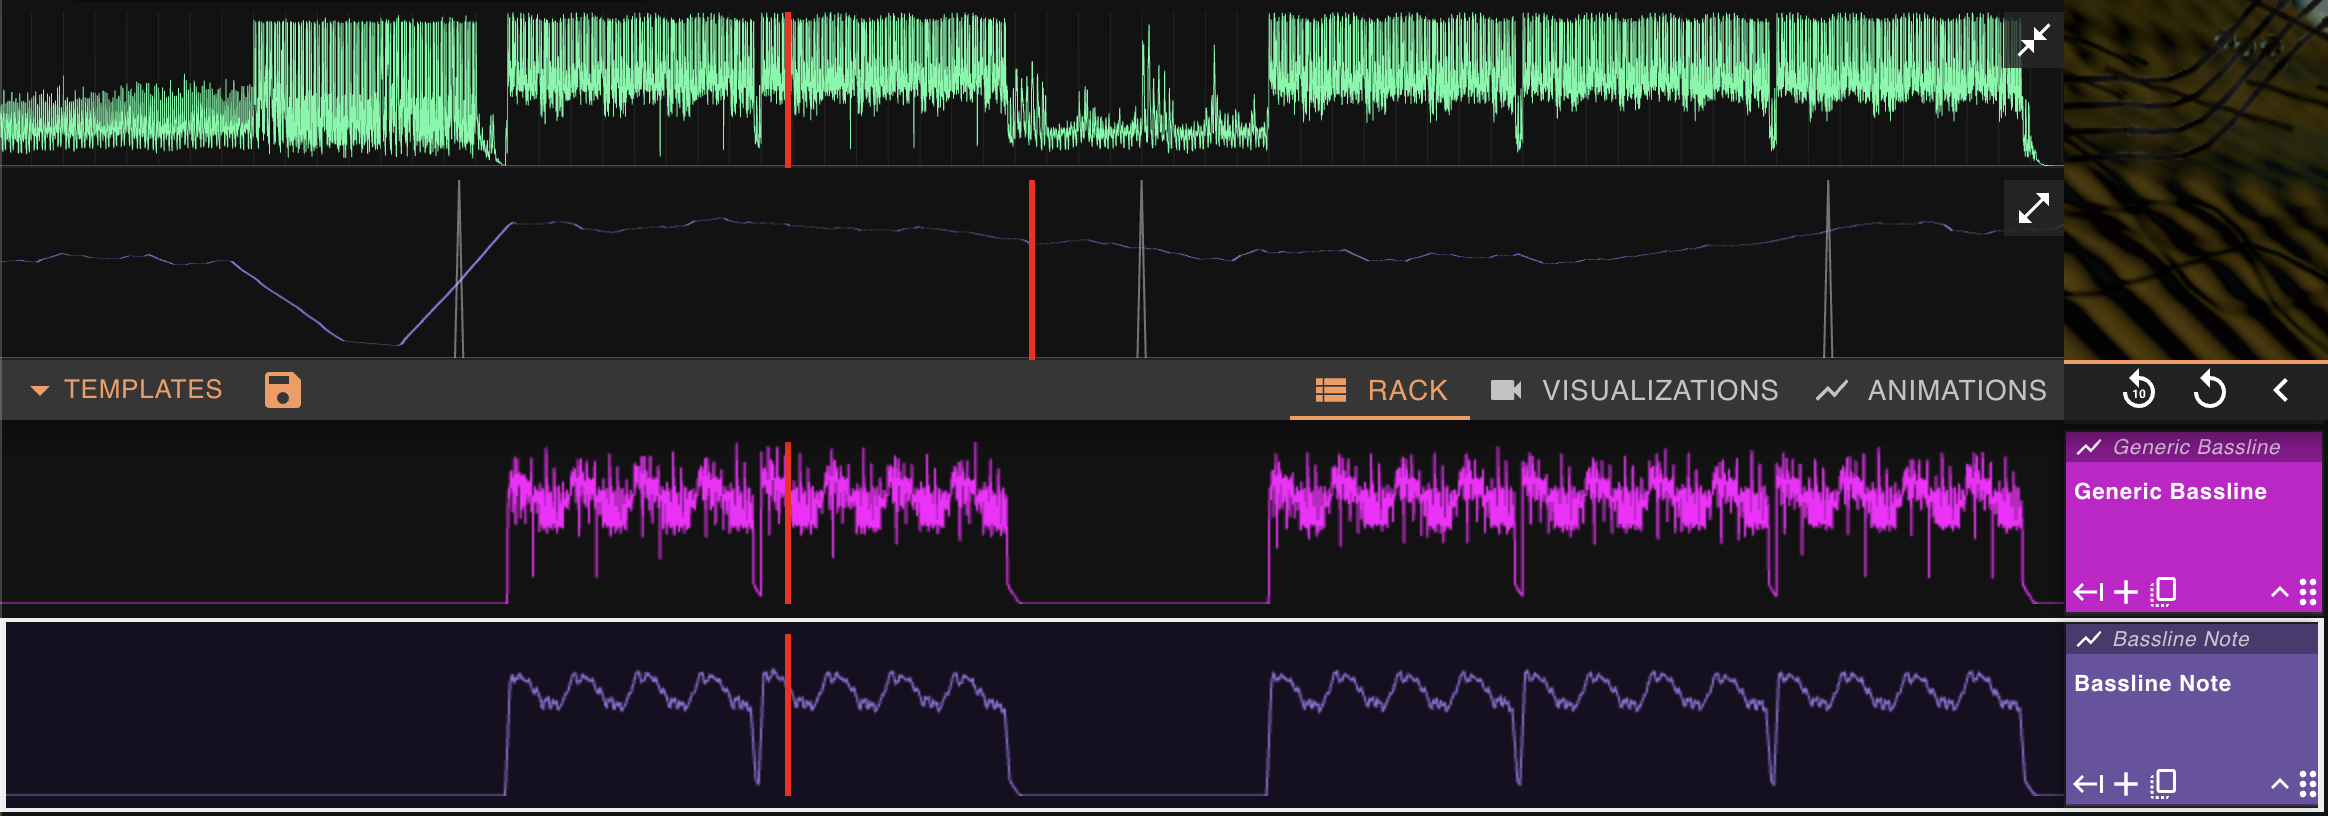
The bass stem's volume chart traces the riff closely enough to drive a visual's color hue.
When A More Hands-On Approach is Needed
The psytrance remix is where things got genuinely tricky, but also where the result was the most satisfying. While visualizing it for a performance I had a few months ago, I noticed a very beautiful melody towards the end of it and, crucially, didn't follow the track's rhythm at all. That makes it a real challenge, because there wouldn't be any metronome or grid to lean on: it's necessary to pull the notes out of the sound itself.
The starting point is a "multiple notes" track (a stripped-down cousin of the rolling-bass track in the layered template) that lets me assign a different visual to each note. Extracting the actual notes is the interesting bit. I feed in the transients track coming from a "melody" stem track, which spikes wherever the sound changes abruptly (a rough but useful stand-in for "a new note just started"). I clean that up with a crossings node, which turns every upward crossing through a certain numerical value into an even pulse, then a split-pulses node that rotates those pulses across three layers so each note lights a different element. A final decay node turns each note into a gentle fall instead of a hard flash.

The node graph that turns a melody stem's transients into one clean pulse per note, split across three layers.
Finally, I hit a snag: there were really two melodic voices, and both came out of the same melody stem, so I couldn't cleanly separate them by frequency. I ended up gating them by hand with track-structure animations, letting each appear and disappear only where I knew it was playing. One voice draws from a melody stem isolated to its low end with a sharp decay; the other just takes the full melody stem, because that particular instrument was too hard to isolate on its own.
Still, once everything came together, it really felt like I could "see" these melodies play out visually in the form of ghostly figures flying through the grass fields of the resulting video.
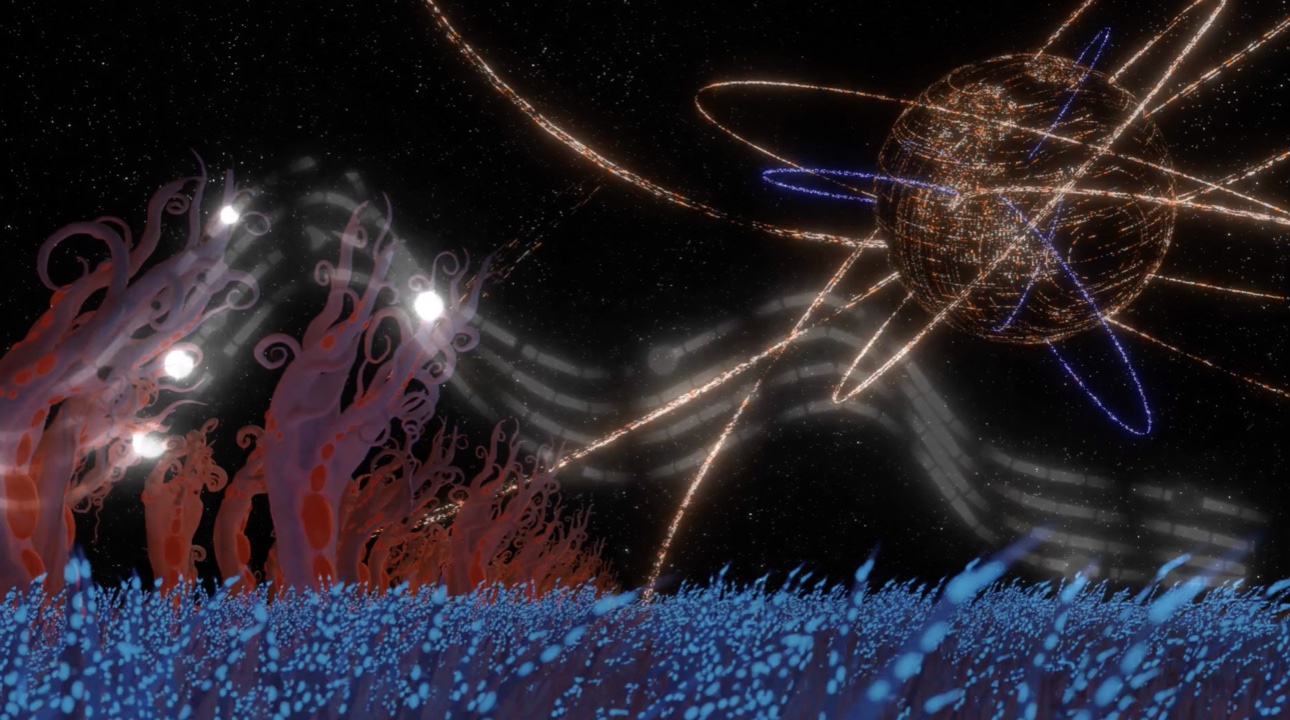
The two melodic voices as they ended up on screen: ghostly figures drifting across the grass fields.
Automation Plus the Human Touch
That melody was a rabbit hole, and I won't pretend otherwise: it's far more work than I'd want to do for every track in a set. But it's a good illustration of the creative journeys you can embark on when inspiration strikes. I try to extract as much as I can straight from the song's own data, get the result as close as possible, and then keep the option open to jump in and make manual enhancements where the automatic approach falls short. The final result represented the melody in a way I found really satisfying, even if the last few steps came from hand-tuning.
The effort compounds. Once I've built a "melody" track like this, I can make it part of a Vizloom template, and the next time a song offers up a melody that deserves this treatment, I can instantly leverage this same work. That's the same principle behind everything else in this workflow: spend the focused time once, then reuse it quickly across many songs.
Try It Yourself
If any of this sparked ideas, you can try it for yourself: download Vizloom and play around with stems on your own tracks.
If you're new to the app, a few good places to start:
- Quick Start Guide — go from zero to a finished, music-driven video.
- Tracks and Nodes — build your own track types from scratch.
Either way — stay artsy, and thank you for reading.